STEP 1 - The Design:
This whole process started because we had written a scene in one of our rotating serials, CAPTAIN COMET IN THE 33RD DIMENSION, that required a ray-gun of sorts. The hero, Duke Sterling AKA Captain Comet, uses his trusty ray-pistol to blast through a door. Classic.
Well, a quick cup of coffee and a few pen scratches later, we had our design.
That was easy.
Yeah right.
We wanted to capture the look of the old Buck Rogers movie serials of the late 30’s; they had these really cool chintzy tin prop guns that are so strangely ridiculous, you can’t help but love ‘em. And if you follow rock music, you would recognize the Buck Rogers Rocket Pistol XZ-31 on the cover of the Foo Fighter’s first self-titled album.
Of course, finding one of those ain’t easy, and they’re not cheap – and we live for cheap!
So using that image and several other vintage 30’s era references as a model, we sketched this design.
STEP 2 – The Stuff:
This is always the most enjoyable/irritating part of any prop build - finding the “stuff” to turn into (insert strange prop name here). When you’re “spit-balling” - as we like to call our flights of fancy - this is the step that requires the most work.
 We were at Radio Shack looking at parts for another prop when we stumbled upon a really cool soldering iron with a neat retro-style handle. It looked like it could be taken apart easily, it fit our design, and it was cheap. Score 1 for us.
After much discussion regarding what characterizes a cool “Ray Gun” tip, we decided that we needed something that looked like one of those old fashioned honey dippers. Well, nothing looks more like a honey dipper than a honey dipper, so off we went. After much hunting, however, we discovered that honey dippers are apparently not as common as one might think, at least not in Southern Colorado. And they’re not cheap either. After striking out for several days, we decided to go onto good ole’ E-bay. A quick search yielded the perfect hardwood honey dipper - not only did it have the shape we wanted, it was CHEAP! Score 2 for us.
 We like to visit the ARC thrift store on a pretty regular basis, and while combing through old kitchen utensils, we found this steamer basket. It was a little worse for wear, but it looked like a radar dish when it was open, and that seemed like a cool idea. Score 3.
It was at this point that we realized our ray-gun had turned into something else; pieces like these don’t just fall into your lap for no reason. Upon reflection we realized that we had inadvertently created another prop, necessary to the script, that we hadn’t even started thinking about yet. And thus, the ANTI-KERSHPLOOGLE DEFLECTOR SHIELD was born.
(And don’t worry; we’ll get back to the ray pistol in another blog.)
STEP 3 – A Prop is Born – Assembly:
 The soldering iron was completely stripped, and all elec-trickery removed. Once the handle pieces were washed of the industrial lubricant from their manufacturing process, we reassembled them and the lower stem pipe of the soldering iron. After a thorough cleaning with a Scotch-Brite pad to remove old grease and goo, we pulled the handle from the steamer and enlarged the center hole so that it would slide over the soldering iron pipe. A few mounting holes drilled around the center allowed us to screw it to the handle. No need for epoxy as the attachment was solid.
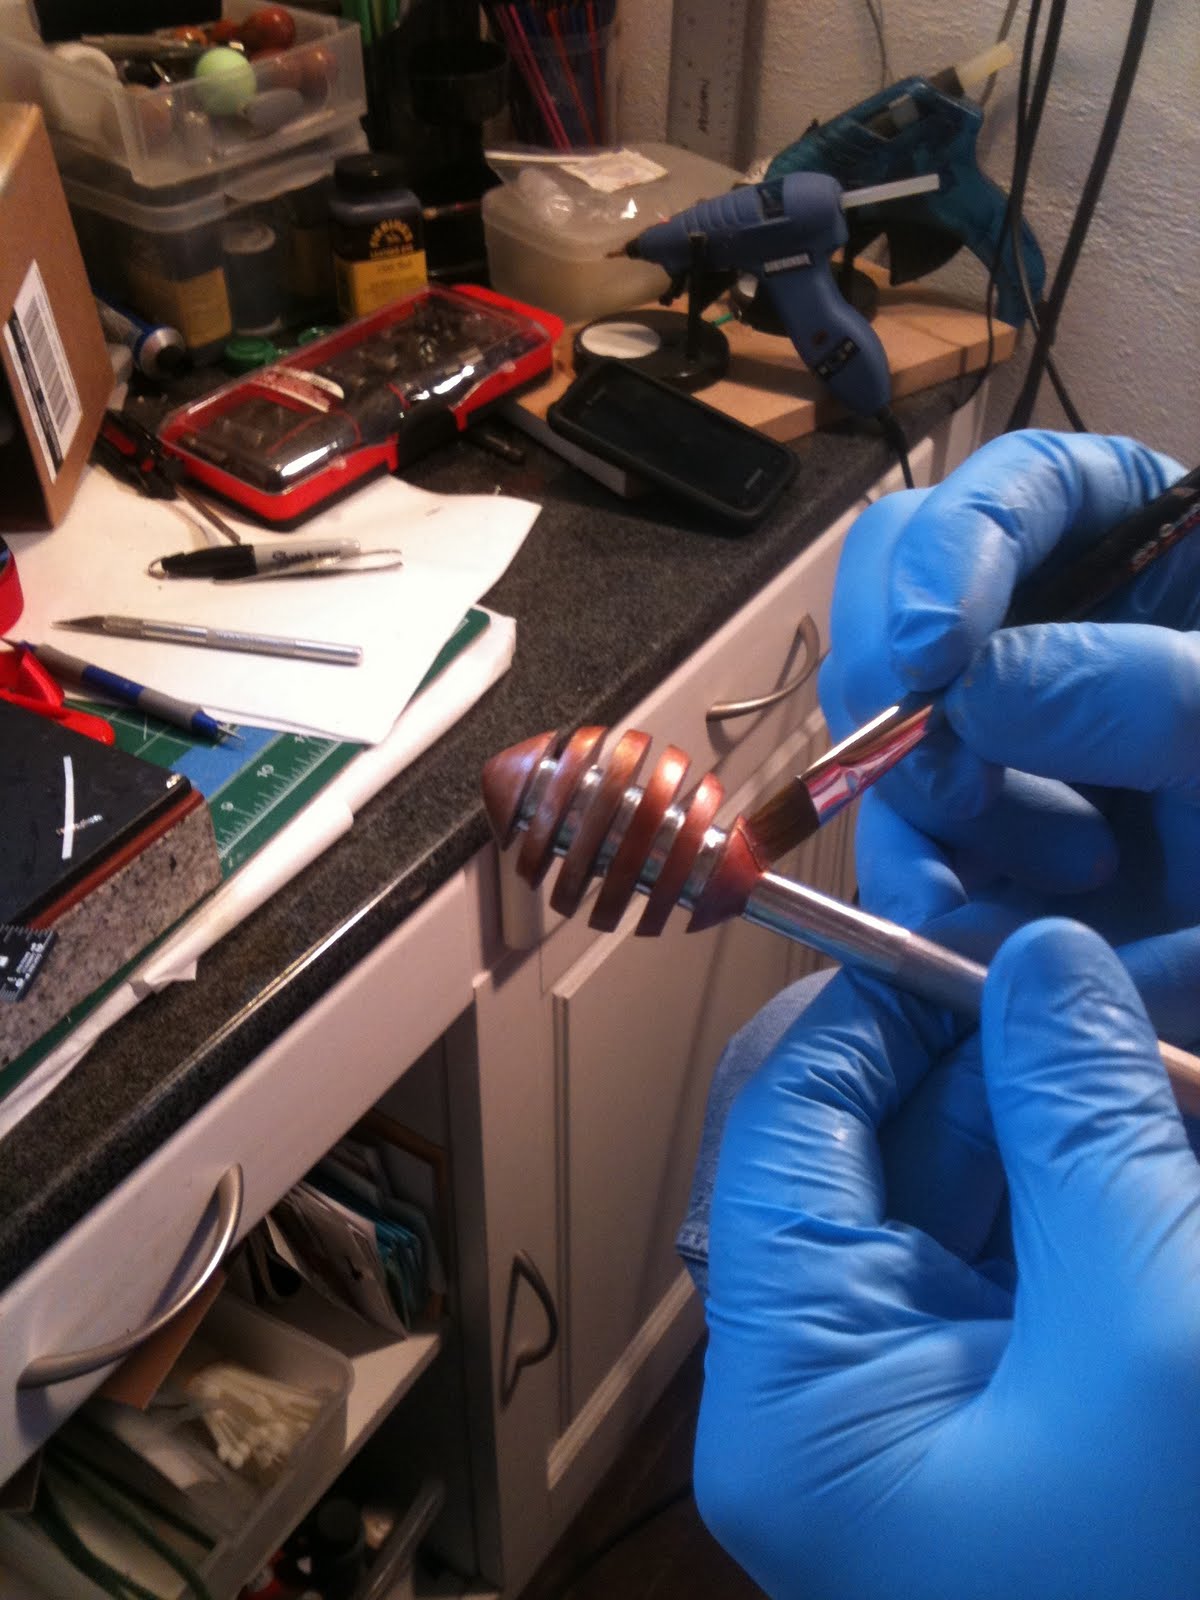
Next we painted the honey-dipper. We went with a silver spray paint base coat then brushed on a coat of copper acrylic model paint. We thought that the inner “stem” of the dipper should look like shiny metal, so we cut very thin strips of aluminum Shurtape and carefully attached them around the inner stem, and around the based stem underneath the dipper “bulb”. A quick coat of sealant, and we inserted the dipper handle into the soldering iron pipe. Epoxy secured it in and voila’!
SETP 4 – The Final Prop:
And here’s the final prop.
At this point in the process we were still trying to figure out some sort of “trigger system” that would make the basket open like a radar dish. Then we discovered – by accident – that a simple flick of the wrist would do it for us. Sometimes the best solutions are the least complicated.
So there you have it. How to make an ANTI-KERSHPLOOGLE DEFLECTOR SHIELD for about $15!
Stay tuned next time when we’ll show you how we make our “SLAPSHOT” sound effect devices – nothing makes a “crack” or a “bang” better than these!
-The WYNOT RADIO crew